How To Make Floss Bobbins
New floss all neat and tidy. It helps if you also make a cut to put through the end part of the thread so that the whole thing stays intact.

Simple Way To Label Thread Bobbins Cross Stitch Floss Cross Stitch Thread Cross Stitch
Here is some basic equipment you will need.

How to make floss bobbins. I glued eight origami boxes together which are just enough to house all my embroidery floss bobbins. Otherwise it ends up with entangled thread. Floss Flower Thread Bobbins and Label Set Lori Holt of Bee in my Bonnet ISE-730 Your floss will stay neat tidy and pretty darn cute on these Floss Flowers.
Since I make the bobbins out of cardboard I use a pen to label them. Take the embroidery threadfloss and take off the paper tubes wrapping it. Be careful if its a delicate thread it.
Anchor the ends on the floss in the small slits. After you take off the wrappers separate the floss so its a circle instead of a line. Completely cover the bobbin with tape.
Based on the size of the finished compartments I made the box and the lid from of course cereal box and wrapped them with scrapbook paper. Keep them locked together with a simple binder ring or key chain. If not you can use the wrapping paper tube with the floss number and stick it to the floss bobbin or even stickers.
Use scotch tape to tape the label to the bobbin. Youll just need to cut through the cardboard in shapes of bunnies or any other fun shape you want to just wide enough to wrap your embroidery floss around it. Cut two small slits on either side of the label to hold the floss.
Wind your floss around the bobbin. Continue to pull it under the needle then back up toward the needle tip. Pull about 15 inches of thread loose from a skein of embroidery floss.
Therefore Sashiko Thread requires a special attention to store it in a good condition. You are welcome to download the line drawing for the Shabby Shop Embroidery Floss Bobbins HERE. The descriptive version is.
Do this in a well lit area so it is easier to see the outline. Now you get to put your thread on the bobbin. Sand any rough edges with a small piece of sandpaper or a large nail file.
You can bet if I do something a lot that means it doesnt require a lot of patience. Pick out some duct tape and lay your bobbin on it. Wrap the floss around the bobbin and then tuck the second end on one of the angled slits as well.
Cut it to size and fold it over the top of the bobbin so that the number will be clearly visible. Lay the end of the floss along one side of the bobbin and manually wrap the floss a few times around the card to secure the end. Balsa wood is very easily cut using a sharp craft knife or scalpel.
Find one end of the floss and tuck it into one of the angled slits. When pulling embroidery floss from the skein its important to pull from the right end to avoid a tangled mess. It will make a perfect ball This is a tutorial how to make Sashiko Thread Bobbin Itomaki for enjoying Sashiko thread until the end.
Once it is cover push down the tape so you can see the outline of the bobbin. Wind individual skeins on a flower then record the thread color on a label and simply stick it on. 30 or more cardboard - chipboard floss cards floss bobbins wind your floss yarn and threads.
From the embroidery piece place the floss over your needle. Put them aside -- youll need them later. Dont let your cat to play.

Pin By Janet Davis On Craft Corner Free Printable Paper Dolls Papercraft Printable Embroidery Floss

Sweet Creatures Printable Floss Bobbins Embroidery Floss Floss Embroidery Tutorials

Cat Embroidery Floss Bobbins Spools Embroidery Floss Storage Embroidery Bobbins Embroidery Floss
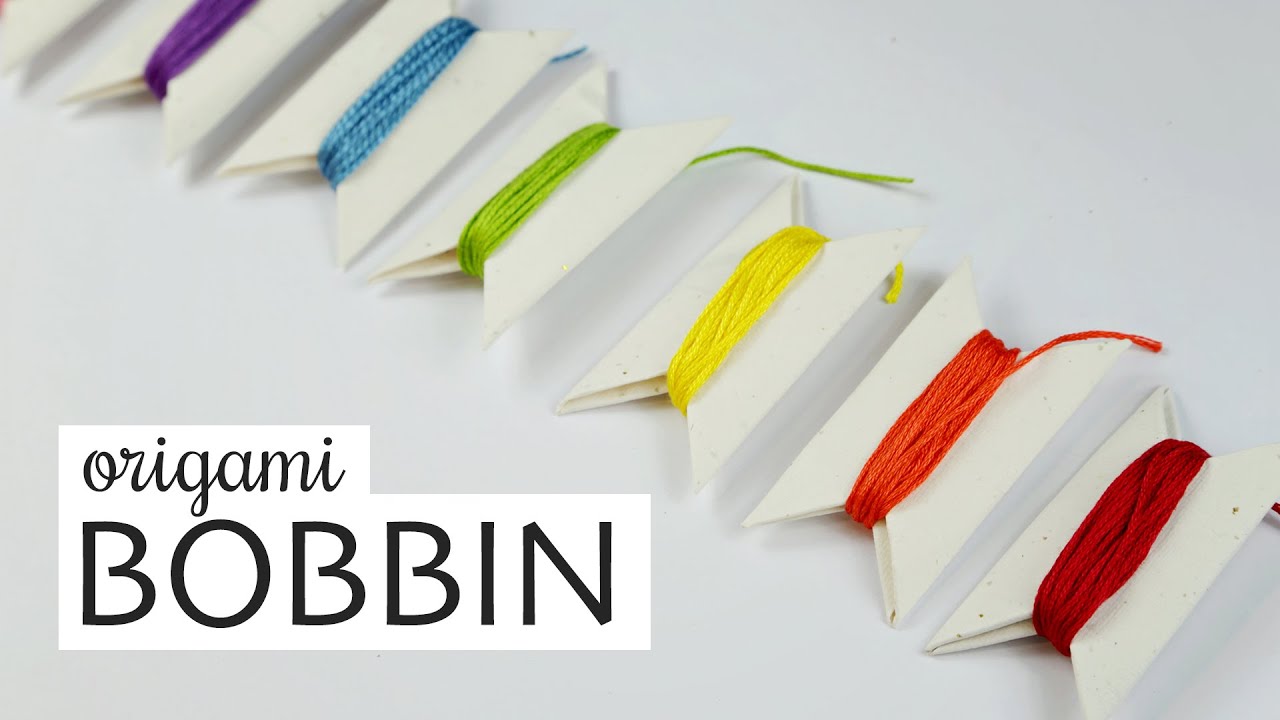
Origami Bobbin Spool Tutorial Sewing Thread Holders Diy Paper Diy Holder Thread Holder Diy Paper

Wood Thread Bobbins Floss Keeper Embroidery Thread Thread Handmade Gifts Floss Embroidery Thread
Posting Komentar untuk "How To Make Floss Bobbins"